Astro Content Collection and Tina
For a long time, I just relied on basic React for SPA and a headless CMS called Strapi to handle my blog content moderation. It let me work on actual content more than having to make unnecessary changes in my code. It was easy to use, had great documentation, and was flexible enough to handle most of my needs. However, as my app grew in complexity, I found myself spending more and more time managing the infrastructure instead of actually shipping features. I wanted something simpler and more streamlined for my blog. I wanted to cut the cost of hosting and deploying my app.
Table of Contents
Why Astro?
I like Astro, because it has Zero JS by default. It doesn’t use any JavaScript runtime overhead to slow you down. For my blog, it just made the perfect sense. Also Astro being UI-agnostic is just perfect for me as I get to experiment with other frameworks. Currently it supports React, Preact, Svelte, Vue, Solid, Lit and more.
Astro includes a built-in content collection system. Astro’s content collection system uses a simple directory structure to organize your content. Each content type is defined by a folder, and each piece of content is defined by a file within that folder. For example, if you’re building a blog, you might have a folder called posts, and each post would be defined by a separate Markdown file within that folder.
At first, I didn’t take leverage of the content collection system. After transitioning to it, my blog is now more organized, has great validation and great TypeScript type-safety features.
Why TinaCMS?
I found that managing my content directly within my codebase was still a bit cumbersome. I missed how Strapi took care of UI stuff and let me visualize my content in a single place. That’s why I started using TinaCMS, a lightweight, open-source CMS to replace my workflow.
How to install Astro
Creating a new Astro project is a simple process that can be done using the CLI wizard.
The CLI wizard allows you to create a new Astro project with just a few commands. Here’s how you can use it to create a new Astro project:
Prerequisites
Before you start, make sure you have the following installed on your system:
Steps
- Open a terminal window or command prompt.
Type the following command to create a new Astro project with npm:
npm create astro@latest - Alternatively, you can use Yarn to create a new Astro project:
yarn create astro@latest - The CLI wizard will prompt you to enter a name for your new project. Choose a name that is descriptive and easy to remember.
- Next, the wizard will ask you to choose a starter template for your new project. You can choose from a list of pre-configured templates, or you can create a custom template from scratch.
- Once you’ve chosen a starter template, the wizard will install all the necessary dependencies and set up your new Astro project.
- Finally, you can navigate to your new project directory and start building your Astro site.
Additional Resources
For more detailed instructions on how to install Astro using the CLI wizard, create a new project from an existing Astro GitHub repository, or install Astro manually, check out the Astro Installation Guide on the official Astro website.
How to integrate Tina with Astro
Now that you have Astro installed. Make sure you have a few blog posts ready to go. Follow the official guide from Astro. This is crucial so we can have proper directories set up with Tina.
To get started, navigate to your site’s directory and run the following command:
npx @tinacms/cli@latest init
This command will ask you a few setup questions. When prompted for the “public assets directory”, enter public.
Modeling Your Content
To edit your site’s content in TinaCMS, you’ll need to model your content in the tina/config.ts file. You can learn more about content modeling in the official TinaCMS documentation.
When you are configuring your schema, make sure to have the right path to your content collection directory.
For example, if you have a few blog posts (.md files) under src/content/blog folder. Set the path as following:
schema: {
	collections: [
		{
			format: "md",
			name: "blog",
			label: "Blog",
			path: "src/content/blog",
			fields: [
				{
					type: "string",
					name: "title",
					label: "Title",
					isTitle: true,
					required: true,
				},
			],
		},
	];
}
Starting TinaCMS
You can start TinaCMS with the following command:
npx tinacms dev -c "astro dev --port 8080"
Note that astro dev --port 8080 should be replaced with your site’s custom dev command, if you have one.
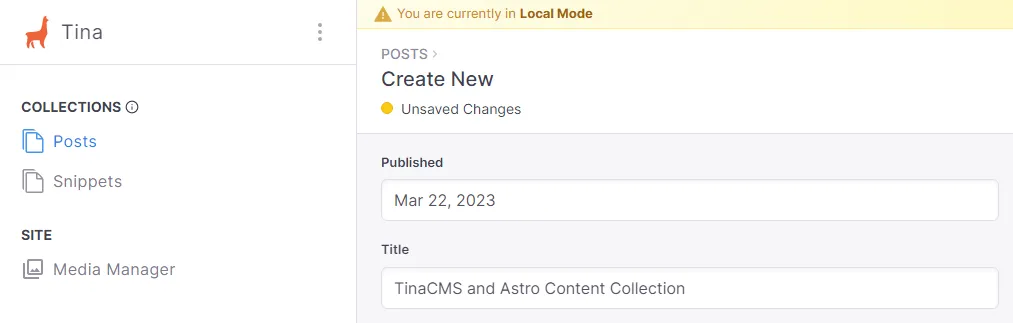
Once you have started TinaCMS, you can navigate to http://localhost:8080/admin/index.html in your browser to access the TinaCMS admin interface. Keep in mind that the default port 8080 may differ depending on your framework.
If you encounter any errors when running this command, check out the Common Errors page in the TinaCMS documentation.
Conclusion
Finally, I decided to switch from Heroku to Vercel for hosting and deployment. Vercel’s free tier offers more than enough resources for my needs, and its integration with Astro made deployment a breeze.
Overall, I’m thrilled with my new workflow. By using Astro and TinaCMS, I’ve been able to simplify my content management and development process, while also reducing my infrastructure and hosting costs. If you’re looking for a simpler, more streamlined way to build and deploy your web applications, I highly recommend giving Astro and TinaCMS a try.
- tags:
- javascript (5)
- react (4)
- astro (2)
- static site generator (2)
- tinacms (1)
- content collection (1)

